Installing a CPU Fan - How to Install a CPU Fan
Installing a CPU fan correctly is important for keeping your computer cool and quiet. Learn how to install a CPU fan in a few quick steps.
Before installing a CPU fan and heatsink, you'll first have to determine whether you need to apply thermal paste to the CPU.
As we have explained in our "What is CPU thermal paste" article, it is essential to have thermal paste between the CPU and heat sink. Without it, your CPU will run about 20 to 30°C hotter under load. Even if your CPU doesn't overheat and shut down immediately, its lifespan is going to be shortened considerably.
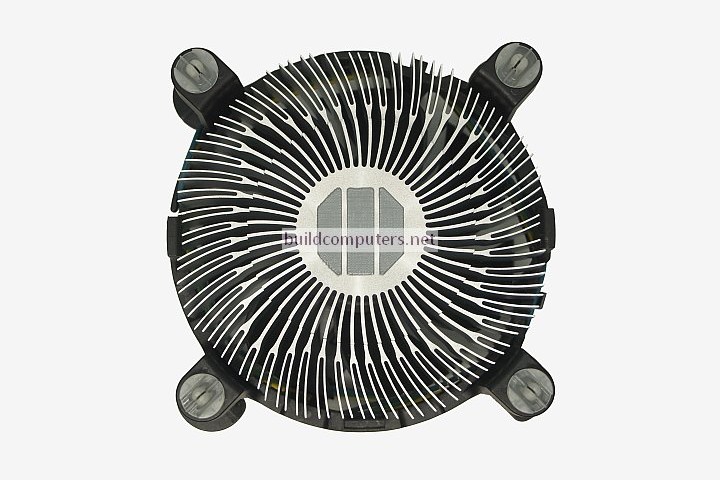
If you're installing the default Intel or AMD heat sink fan for the first time, then there is no need to apply any thermal compound. The reason is simple - The standard CPU fan (called a stock cooler) that comes with every boxed Intel and AMD CPU has thermal paste pre-applied to its base. You can see the three grey stripes of pre-applied thermal paste in the image below:
If you're installing a stock cooler than has been used before or an aftermarket heatsink fan, then it's a must to apply thermal compound to the CPU before proceeding - Click here to learn how to apply CPU thermal grease.
Begin CPU fan installation by making sure that all four push pins are facing the correct direction. The grooves on the push pins should be facing the center of the CPU fan (see image below):
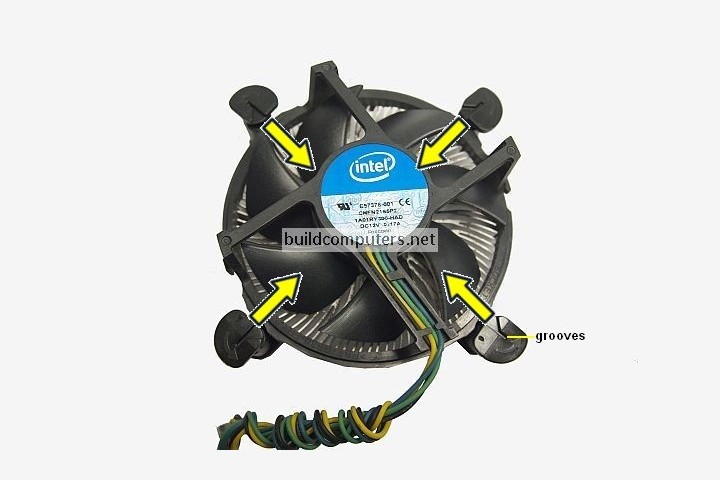
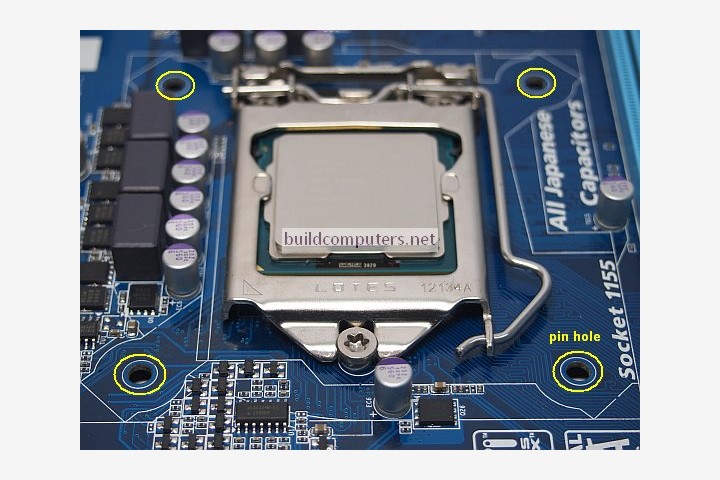
To install a CPU fan and heat sink, you will need to align the four push pins of the heat sink (circled in yellow above) with the four pin holes on the motherboard (circled in yellow below):
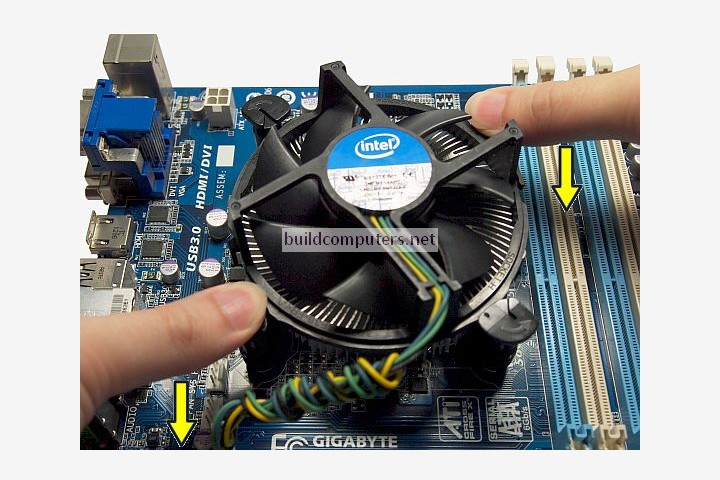
Once everything is aligned, place your thumbs on the two diagonally opposite push pins and press down on both pins at the same time until you hear a "click" sound. See image below:
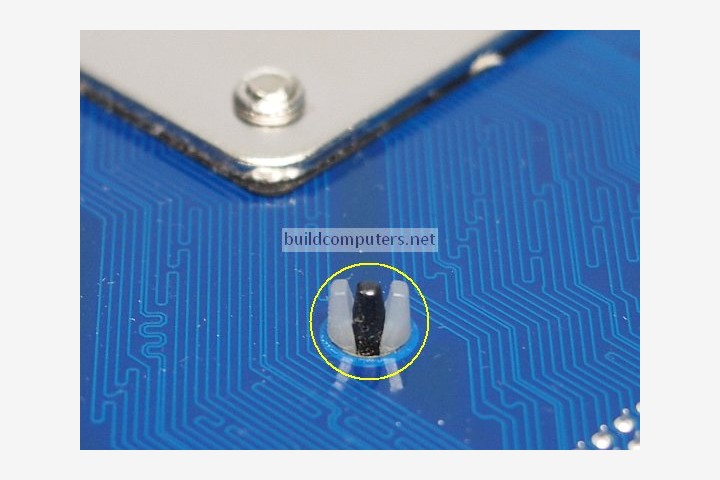
Once you have pushed down all four pins, take a look at the bottom of the motherboard. If you have installed the CPU cooler correctly, the pins should protrude fully as shown in the image below:
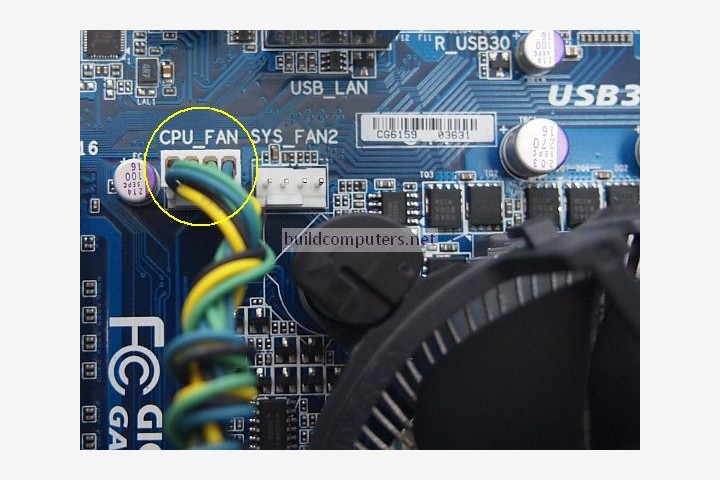
Now we are down to the final step of installing a CPU fan: Plug the CPU fan power connector into the 4-pin CPU fan header on the motherboard. On most motherboards, this header will be located near the CPU socket:
NEXT: Installing RAM Memory
HOW TO BUILD A COMPUTER
- Should I Buy or Build a PC?
- Parts to Build a Computer
- Installing a CPU Processor
- Installing a CPU Fan
- Installing RAM Memory
- Installing a Motherboard
- Installing a Power Supply
- Power Supply Connectors
- Installing a Hard Drive
- Installing a DVD Drive
- Installing a Graphics Card
- Computer Cable Management
- Computer Cable Connections

